Posted on — Leave a comment

More Than a Brand Name: Choosing the Right Agricultural Belt

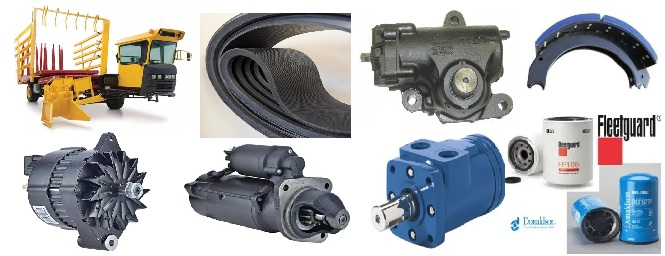
Agricultural Replacement Belts You Can Count On From Emerson Ag

When a belt fails during planting, haying, or harvest, choosing the right agricultural belt becomes a priority. At Emerson Ag, we source replacement belts from a trusted supplier and back our offering with something that matters to us: years of selling these belts without a problem.

We believe dependable replacement belts should come with straightforward service, clear application information, and confidence in what you are buying.

The Right Belt for Your Equipment

With so many belt brands and replacement options available, choosing a belt can feel more complicated than it should. Our approach is simple: start with the equipment and identify the replacement the application calls for.

Our supplier’s range includes conventional V-belts, aramid-reinforced belts, banded belts, cogged belts, variable-speed belts, and specialty profiles. That broad selection allows us to source replacements for a variety of agricultural and farm-support equipment.

Depending on the application, available options include:

  • Conventional V-belts for equipment using traditional belt profiles.
  • Aramid-reinforced belts for applications specifying reinforced construction.
  • Banded belts for drives designed to use joined belts.
  • Cogged and wedge belts in a range of replacement configurations.
  • Variable-speed belts for equipment requiring that design.
  • Specialty belts, including double-angle hex and metric profiles.

Not every belt type belongs on every machine. Our goal is to help identify the correct replacement—not simply find something that looks close.

A Trusted Source, Backed by Our Experience

At Emerson Ag, we choose our products with our customers in mind. We source these belts from a trusted, established supplier with a broad replacement catalog and extensive equipment-part-number cross-references.

Just as importantly, we have sold these belts for years without a problem. That firsthand experience is why we are comfortable offering them to our agricultural customers.

We are not claiming that one belt is the best choice for every machine. We are saying that these are products we have experience selling and confidence offering.

Replacement Options for the Farm and Beyond

Agricultural operations depend on more than field equipment alone. Mowers, grounds-maintenance equipment, skid steers, and other support machines all have a place in keeping an operation moving.

Our sourcing options include equipment-specific replacement belts alongside standard industrial profiles. Whether you need a belt for a familiar machine or help identifying an older replacement number, Emerson Ag provides a practical place to start.

Availability and fit depend on the particular machine and belt specification.

What to Bring When You Need a Belt

A little information can make the identification process much easier. When contacting Emerson Ag, have as much of the following available as possible:

  • The number printed on the existing belt.
  • The equipment manufacturer’s replacement part number.
  • The machine’s make and model.
  • The belt’s function or location on the machine.
  • Photos of the belt, its markings, and the drive arrangement.

If the markings have worn away, tell us what information you do have. We can work from there to help identify a suitable replacement.

What About “OEM Equivalent” Belts?

Some replacement belts are cataloged as “OEM equivalent.” That describes a replacement offered for an equipment manufacturer’s part number; it should not be confused with a claim that the belt is the original factory-branded part.

At Emerson Ag, we aim to keep that distinction clear. The priority is matching the replacement to the equipment’s requirements and being straightforward about what we sell.

Practical Value and Straightforward Service

A recognizable name is one consideration when buying a belt, but it is not the only one. Correct application, dependable performance, availability, and your experience with the seller all matter.

Our approach is to offer a practical replacement option backed by a supplier we trust and our own years of positive sales experience. We want customers to feel comfortable asking questions and confident that the application—not just the label—is guiding the selection.

Contact Emerson Ag for Replacement Belts

Emerson Ag offers agricultural and equipment replacement belts sourced from a trusted supplier and backed by years of firsthand experience.

Bring us your belt number, equipment part number, or machine information. We’ll work with you to identify the replacement your equipment calls for.

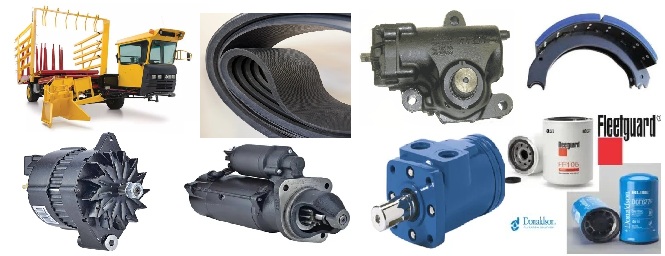
New Holland Bale Wagon and Stackcruiser parts is our specialty but you can also discover everything you need to maintain and repair your hay and forage equipment in our Parts Store.
Posted on — Leave a comment

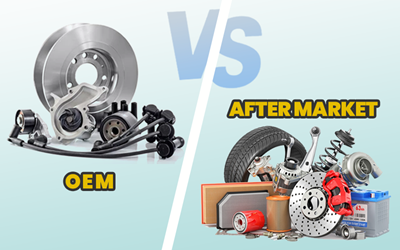
What are the benefits of hay producers using aftermarket parts suppliers over the OEM for their equipment repairs?

What are the benefits of hay producers using aftermarket parts suppliers over the OEM for their equipment repairs?

For hay producers, reputable aftermarket parts suppliers can offer lower repair costs, more sourcing options, and an economical way to keep older equipment working. The biggest benefit is value: getting a dependable repair at a reasonable total cost—not simply buying the cheapest part. Aftermarket quality varies, so the supplier and the specific component matter as much as the price.

Main benefits for a hay operation

BenefitWhat it means for the producer
Lower upfront repair costsAftermarket parts can cost less than OEM alternatives, making them useful for budget-conscious repairs and older or seasonal equipment. Savings depend on the particular part; there is no reliable blanket percentage for every repair.
Another option when the dealer is out of stockIndependent suppliers provide an additional sourcing channel. When the correct aftermarket part is available sooner than the OEM part, it can shorten downtime rather than leave the machine waiting for a backordered component. Availability still needs to be checked case by case.
More economical repairs on older machinesOn an older baler, rake, or mower-conditioner, a lower-cost replacement may make continued operation more practical. Equipment dealer RDO specifically identifies older and seasonal equipment as sensible applications for aftermarket parts.
More choices in price and qualityInstead of a single OEM offering, producers may be able to choose among several manufacturers and quality levels, matching the purchase to the machine’s workload and expected remaining life.
Potential design improvementsSome aftermarket manufacturers offer revised materials or designs rather than a straight replacement. These can be worth considering, but an “upgrade” should be supported by specifications and a credible performance record—not just a sales claim.

Why availability can matter as much as price

For a hay producer, the useful comparison is the total cost of getting back to work, not just the price on the invoice. Expected service life, installation time, reliability, warranty coverage, and the consequences of another failure all belong in that calculation. A less expensive part is good value only if it performs adequately; a readily available part can also be valuable when it avoids a long wait for the OEM alternative.

That also makes aftermarket suppliers useful as a second source rather than necessarily a replacement for the dealer. Comparing both channels lets the producer weigh actual stock, delivered price, fit, support, and warranty for each repair.

Where to be selective

A sensible approach is to evaluate aftermarket options for routine replacements and older, out-of-warranty equipment, while being more cautious with safety-critical, precision-matched, or high-consequence components. Small differences in dimensions or materials can affect performance and cause additional wear, so “fits this model” is not enough by itself.

Before ordering, check:

  • Exact compatibility with the machine and its configuration.
  • The manufacturer’s reputation and the component’s specifications.
  • Actual stock and delivery time—not merely a catalog listing.
  • Warranty, return terms, and technical support.
  • Whether any price saving could be outweighed by shorter life or repeat installation labor.

The strongest purchasing strategy is therefore part-by-part: use a trusted aftermarket supplier where it offers a verified fit and better overall economics, and retain the OEM option where its engineering assurance or support justifies the premium.

How to find reputable aftermarket farm equipment suppliers

The best way to find reputable aftermarket farm equipment suppliers is to build a short list, then verify how well each supplier handles fitment, product sourcing, and support—not just price. For hay equipment, model and serial-number matching is especially important because parts can change within a model’s production run.

1. Start with suppliers that know your equipment

Use several channels to identify candidates:

  • Ask your independent farm-equipment mechanic and nearby hay producers which suppliers they use—and which have handled a wrong part or warranty claim fairly. Treat those conversations as reference checks, not just name gathering.
  • Search an agricultural trade directory. Farm Equipment has a public Guide to Suppliers with replacement-parts and mowing-equipment categories. A listing is a starting point for research, not a quality certification.
  • Look for catalogs organized around your actual equipment: round balers, square balers, mower-conditioners, disc mowers, or rakes. Detailed parts listings and cross-references make it easier to evaluate compatibility.

2. Make the supplier prove the part fits

Before requesting a quote, gather your machine’s make, model, serial number, OEM part number, and photos or measurements of the old part. Suppliers’ hay-parts catalogs illustrate why these details matter: baler belts require matching dimensions and construction, while rake components can require matching bolt patterns, handedness, and OEM cross-references.

Ask the supplier:

“Can you confirm this replacement fits my model and serial number, and show me the OEM cross-reference and relevant specifications?”

Prefer a clear, documented answer over “it should fit.” For example, Quality Farm Supply explicitly advises matching baler parts to the specific model and serial number, and Schmidt & Sons provides hay-equipment parts books and a Hesston-to-Case IH cross-reference.

3. Use the same screening questions for every supplier

Here is a practical checklist to use before placing an order:

AskWhat you want to establish
“Who manufactures this part?”Whether the seller can identify what it is supplying rather than relying on a generic “OEM quality” claim.
“Is it new aftermarket, rebuilt, or used?”Exactly what condition and product category the quoted price covers.
“Is it physically in stock, and where will it ship from?”Whether the promised delivery is based on actual inventory.
“What happens if you confirm fitment and it is wrong?”Who pays return freight, whether restocking fees apply, and whether an installed part can be returned.
“What does the warranty cover?”The duration, exclusions, claim procedure, and whether coverage is limited to the replacement part.
“Can I speak with someone familiar with this machine?”Whether technical support goes beyond taking an order.

Keep the answers with your quote or order confirmation. This gives you a consistent basis for comparing suppliers instead of comparing advertised prices alone.

4. Investigate a few candidates—not just one

These are examples to investigate for hay equipment, not blanket endorsements:

SupplierWhat they offerContact
Emerson AgGenuine, used, remanufactured, and custom-made parts. Lists parts for 1068, 1069, 1075, 1078, 1079, 1085, 1095, BW28, BW38, H9880, and Stackcruiser models.Emersonag.com | 605-891-4966 | South Dakota | 40 Years Experience
Sod Buster Sales / New Holland Bale Wagon PartsNew and used parts, manuals, specifications, and troubleshooting support. Says it carries many otherwise unavailable parts.newhollandbalewagonparts.com | 406-883-2118 | Polson, Montana | 58 Years Experience
Stackcruiser PartsNew and used parts for nearly every New Holland bale wagon model, with direct shipping.stackcruiserparts.com | 208-519-0305 | 35 Years Experience
New Holland / MyCNH StoreOfficial parts lookup by model, serial number, part number, or keyword, with dealer pickup or delivery options.New Holland’s official parts site | Since 1985

Supplier descriptions establish what these businesses advertise; they do not independently establish durability, service quality, or warranty performance.

5. Test the relationship before an urgent repair

My recommendation is to start with a small, nonurgent order. Evaluate whether the supplier confirms compatibility, ships when promised, delivers the stated brand and specifications, and answers follow-up questions. Use that experience to choose a primary supplier and a backup before hay season.

A useful reference question for another producer is: “What happened the last time something went wrong with an order?” That answer often tells you more about the relationship than a low price or a five-star rating.

New Holland Bale Wagon and Stackcruiser parts is our specialty but you can also discover everything you need to maintain and repair your hay and forage equipment in our Parts Store.
Posted on — Leave a comment

Bale Wagon practical fall-and-winter checklist

Bale Wagon practical fall-and-winter checklist

Here’s a practical fall-and-winter checklist for getting your New Holland bale wagon repaired before hay season. Use it as a shop inspection sheet: check an item only after it passes inspection or the repair is finished.

This is a general checklist—not a model-specific service schedule. New Holland bale wagons differ in hydraulic circuits, controls, and adjustments, so use your wagon’s operator/service manual for oil specifications, lubrication points, chain tension, timing, pressures, and torque values. Emerson Ag provides access to parts and technical-manual resources.

Machine information and repair priorities

Model: Serial number:
Hours, if equipped: Inspection date:
Known problems from last season:

Mark problems as:

  • A — Must repair before operating: safety defects, damaged structural parts, unsafe tires, hydraulic damage, or unreliable controls.
  • B — Complete over winter: wear, leaks, feeding trouble, and intermittent problems.
  • C — Monitor: serviceable items to recheck during the season.

The inspection points below are a working repair-planning template; exact wear limits and repair procedures must come from your model’s manual. Preventive maintenance, lubrication, and adjustments should follow manufacturer recommendations.

1. Before starting any inspection

  • Park empty on firm, level ground; set the brake and chock wheels as needed.
  • Lower tables and load rack where possible.
  • Shut off the engine, remove the key, and disengage the PTO, if equipped.
  • Install the specified mechanical safety supports before working beneath raised tables or the load rack. Never trust hydraulic pressure alone.
  • Relieve hydraulic pressure before opening a line or removing a component.
  • Keep people clear of table travel, rack travel, and other pinch points.

New Holland’s service-manual safety guidance calls for level parking, secured controls, and lowered hydraulic equipment. Extension guidance also requires proper supports for raised equipment and warns that stored hydraulic energy can cause unexpected movement.

Never feel for a hydraulic leak with your hand; gloves will not stop an injection injury. Use an appropriate leak-detection method from a safe position. Suspected fluid injection requires immediate emergency medical care.

2. Fall: clean up and capture last season’s problems

  • Remove loose hay, twine, dirt, and debris from pickup, conveyors, tables, frame, and driveline.
  • Clean enough to expose cracks, loose fasteners, oil leaks, and rubbing hoses.
  • Record feeding jams, missed trips, slow table movement, crooked stacks, and intermittent control problems.
  • Photograph leaks and worn parts before disassembly.
  • List needed parts by model and serial number.
  • Complete lubrication due under the operator’s manual.

Use this stage to build the repair list rather than simply putting the wagon away; agricultural maintenance guidance recommends repairing equipment before it reaches the field.

3. Winter: mechanical inspection and repair list

Work through each section with the machine safely secured. Treat this as an inspection list—not an instruction to replace every part. Use the manual’s measurements and procedures to decide whether a component is serviceable.

AssemblyCheck off after inspection or repair
Pickup/bale loader☐ Bent, broken, or missing pickup components ☐ Bent guides or rubbing parts ☐ Loose mounts ☐ Shaft/bearing play ☐ Worn drive components
Conveyors and drives☐ Chains for wear, stiff links, and damaged connectors ☐ Sprockets for worn teeth ☐ Idlers/tensioners ☐ Alignment ☐ Guards and shields
First and second tables, as equipped☐ Bent surfaces or snag points ☐ Cracks at hinges and cylinder mounts ☐ Worn pins/bushings ☐ Missing retainers ☐ Binding movement
Trips and sequencing☐ Trip arms/linkages move freely ☐ Springs and stops intact ☐ Cables/linkages secure ☐ Adjustments checked against manual ☐ No bypassed safety devices
Load rack and stacking equipment☐ Frame and pivot areas ☐ Cylinder mounts ☐ Rack supports/stops ☐ Push-off equipment, if fitted ☐ Retainers and fasteners
Main frame and running gear☐ Cracks or distorted members ☐ Axle/spindle condition ☐ Loose hubs or noisy bearings ☐ Wheel hardware ☐ Tire cuts, cracking, and pressure
Hitch/PTO, if fitted☐ Hitch pin and retaining device ☐ Drawbar connection ☐ Safety chain, where specified ☐ PTO shaft, joints, guards, and retaining hardware
Controls and electrical☐ Damaged wiring or connectors ☐ Rodent damage ☐ Secure battery connections ☐ Lights/reflectors ☐ Switches, indicators, and interlocks

Structural cracks, failed retainers, missing guards, and unreliable controls belong on the “repair before operation” list. Do not conceal a crack with paint or assume a weld repair is suitable without assessing the component and approved repair method.

4. Hydraulics: give this a separate inspection

  • Inspect hoses for abrasion, cracking, blisters, kinks, exposed reinforcement, and wet fittings.
  • Replace damaged hoses with correctly rated assemblies.
  • Check hose routing and clamps through the full operating range without entering moving areas.
  • Inspect cylinder rods for rust, pitting, scoring, or damage.
  • Inspect cylinder mounts, pins, bushings, and retainers.
  • Identify and repair leaks at cylinders, valves, lines, and couplers.
  • Check fluid condition and level using the manual’s specified machine position.
  • Replace filters and fluid when required by the service schedule.
  • Record slow movement, jerking, drift, or unusual noise for diagnosis.
  • Use model-specific testing procedures before changing relief settings or condemning a pump.

Extension guidance specifically recommends regular hose inspections, clean hydraulic oil, scheduled filter replacement, and rust protection on exposed cylinder rods. New Holland service information separates hydraulic troubleshooting by model group, so pressure settings should not be guessed.

5. Extra checks for a self-propelled wagon

If yours is pull-type, skip this section and inspect the towing tractor separately.

  • Engine oil and filter service due.
  • Air cleaner and intake system condition.
  • Fuel filters, hoses, and leaks.
  • Cooling-system leaks, hoses, belts, and freeze protection.
  • Battery, charging system, and starting system.
  • Steering play, steering leaks, and secure connections.
  • Service brake and parking brake operation.
  • Transmission/final-drive service due.
  • Seat, seat belt, mirrors, visibility, and road lighting.

Follow the engine and wagon manuals for service intervals and specifications; recommendations for self-propelled machinery emphasize manufacturer-specified maintenance and tune-ups.

6. Winter storage finish-up

  • Finish lubrication according to the manual.
  • Protect exposed cylinder rods with an approved rust-preventive product.
  • Store with tables/rack lowered or secured exactly as the manual requires.
  • Make sure hydraulic openings are capped after repairs.
  • Record completed repairs and remaining parts orders.
  • Tag the machine clearly if it is not safe to operate.

Rust protection on cylinder rods and keeping contamination out of the hydraulic system are specifically recommended maintenance practices. Lowered or mechanically supported equipment reduces the risk from stored energy.

7. Before the first trip to the field

  • Remove tools, loose parts, and maintenance materials.
  • Reinstall all guards, retainers, and shields.
  • Recheck fluid levels, tires, wheel hardware, and visible leaks.
  • Verify brakes, steering, hitch, PTO, and lights as applicable.
  • In a clear, level area, test functions using the operator’s manual procedure.
  • Watch for hose interference, binding, abnormal noises, and incorrect sequencing.
  • Shut down and secure the wagon before investigating a problem.
  • After empty-machine checks pass, perform a controlled bale-handling test as directed by the manual.
  • Reinspect after the initial test and close out the repair list.

Manufacturer-directed adjustments and lubrication should be completed before field operation, not improvised during the first load.

Repair log [download copy here]

PriorityLocation/problemRepair or parts neededCompleted/date
_
_
_
_
_

We hope this preventative maintenance list and suggestions helps streamline your repairs and Emerson Ag will do its’ part in saving you money. Thank you

New Holland Bale Wagon and Stackcruiser parts is our specialty but you can also discover everything you need to maintain and repair your hay and forage equipment in our Parts Store.

Contact Emerson Ag

Please email [agparts@emersonag.com] or text [605 891 4966] us with any questions. We are CLOSED on Sundays. No phone calls or texts.

Please enter ALL orders online.
New account orders will only be accepted online.
Existing accounts may call in orders for emergency only. This reduces the margin for errors.

Copyright © 2012 Emerson Ag & Industrial

Posted on

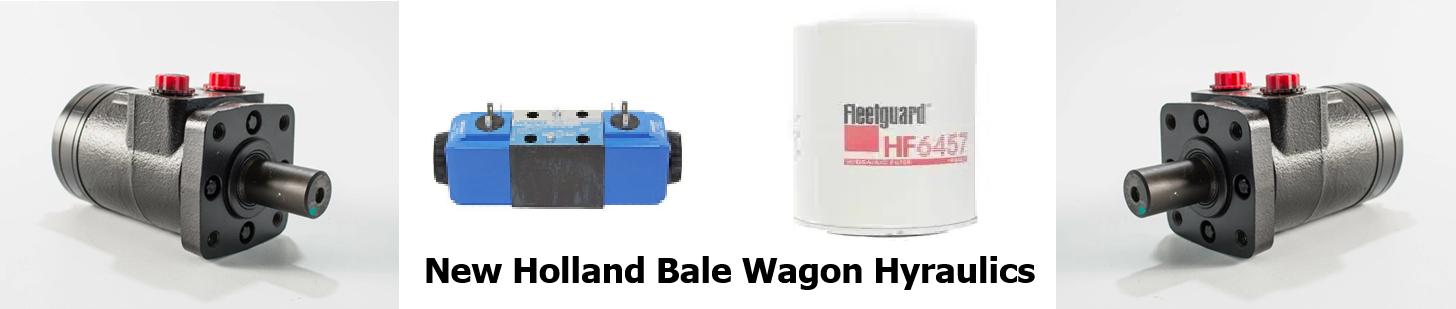
Why is New Holland Bale Wagon Hydraulic Maintenance so critical?

New-Holland-Bale-Wagon-Hyraulics

Regular Maintenance is the critical factor

Fluid contamination is the leading cause of hydraulic system failure, responsible for up to 75% of all issues. 
 Clean hydraulic oil and properly serviced filters are essential for protecting pumps, valves, cylinders, and motors. Regular hydraulic maintenance to your New Holland Bale Wagon and Stackcruiser helps prevent system failures, ensuring equipment reliability and longevity. As a matter of fact checking oil level and condition regularly, replace filters according to the equipment manufacturer’s schedule or filter-restriction indicator, and change hydraulic fluid at the OEM-recommended interval or based on oil analysis. Dust, heat, water, heavy loads, and frequent use may require shorter service intervals. Never rely on a universal hour interval—always follow the machine manual and use the correct fluid and filter specification.

See the article below [Read more] for more direction to lessen hydraulic failures.

Get your New Holland Bale Wagon Hydraulic Filters here at Emerson Ag. Follow this link to add Hydraulic Filters to your next motor change.

1 year warranty. Questions? Please Contact Us.

Hydraulic Fluid & Filter Maintenance

Hydraulic oil does much more than transfer power, unquestionably, It lubricates moving parts, helps control heat, protects against corrosion, and carries contamination to the filters. Clean, correct hydraulic fluid helps equipment operate smoothly and protects costly pumps, valves, cylinders, and hydraulic motors.

Hydraulic filters remove damaging dirt, metal particles, water-related debris, and other contaminants before they can circulate through close-tolerance hydraulic components. A neglected filter can become restricted or go into bypass, allowing unfiltered oil to circulate and accelerating wear.

For the best protection, inspect hydraulic oil level and condition regularly, replace filters at the manufacturer’s recommended interval, and change hydraulic fluid based on the OEM schedule or oil-analysis results.

These are general service guidelines only. Your equipment manufacturer’s maintenance manual and any warranty requirements should always take priority.

Maintenance itemTypical guidelineWhat to look for
Hydraulic oil levelBefore operation or dailyCorrect level, no leaks, no foaming
Hydraulic oil conditionDaily or weeklyOil should generally be clean and clear—not milky, excessively dark, burnt-smelling, or full of visible debris
Hydraulic filter restriction indicatorDuring normal inspectionsService the filter when the indicator shows restriction; do not wait for loss of hydraulic performance
Break-in filter serviceOften around the first 50 operating hours, if specified by the OEMNew systems can release manufacturing and break-in debris
Routine hydraulic filter replacementCommonly 250–1,000 operating hours, depending on equipment and OEM instructionsReplace sooner in dusty, high-load, high-temperature, or wet conditions
Hydraulic fluid replacementOften 1,000–4,000 operating hours, depending on equipment, fluid, and operating conditionsUse the OEM interval, or extend/shorten intervals based on oil analysis
Oil sampling/analysisAt regular scheduled intervals on heavily used or critical equipmentChecks contamination, viscosity, water, oxidation, and wear metals

A fixed oil-change interval is not ideal for every machine. Oil analysis is the most reliable way to determine whether hydraulic fluid remains suitable for service or needs replacement, since heat, moisture, dirt, and operating severity can shorten its useful life.

Why it matters

Contamination is a leading cause of hydraulic-system damage. Abrasive particles can score pump and valve surfaces, plug small passages, damage seals, and cause slow, erratic, or weak hydraulic operation. Proper filtration and clean oil reduce the risk of expensive component failures and unplanned downtime.

Regular service can help:

  • Protect hydraulic pumps, motors, valves, cylinders, and seals.
  • Maintain lifting power, cycle speed, steering response, and implement performance.
  • Reduce overheating caused by restricted filters, incorrect fluid level, or degraded oil.
  • Prevent water contamination, rust, corrosion, and poor lubrication.
  • Identify a developing problem before it becomes a major repair.
  • Reduce downtime during planting, haying, harvest, construction, or other time-sensitive work.

Service sooner in severe conditions

Shorten the normal maintenance interval when equipment operates in conditions such as:

  • Heavy dust, dirt, chaff, or debris.
  • High ambient temperatures or repeated overheating.
  • Continuous high-load or high-cycle work.
  • Wet, humid, or water-exposure conditions.
  • Small hydraulic reservoirs or compact equipment.
  • Frequent attachment changes, hose failures, or hydraulic repairs.
  • Evidence of contamination, premature filter restriction, or poor hydraulic performance.
  • Dusty, high-temperature, and severe-duty operation can require considerably more frequent service than normal-duty equipment.

Warning signs to act on

Service and investigate the system promptly if you notice:

  • Milky or cloudy oil, which can indicate water contamination.
  • Darkened oil, burnt odor, or excessive heat.
  • Foamy oil or jerky/slow hydraulic movement, which may indicate air entering the system.
  • Metal particles or visible debris in the oil or filter.
  • Hydraulic functions that are weak, noisy, slow, or erratic.
  • A filter-restriction indicator showing service is required.
  • Repeated filter plugging before the scheduled interval.
  • Leaks, low oil level, or damaged breather caps and filler seals.
  • Milky oil, foam, burnt odor, or abnormal hydraulic operation are signs that the system should be inspected rather than simply topped off and put back to work.

Best practices

  • Use only the hydraulic fluid grade and specification required by the equipment manufacturer.
  • Use quality filters that meet the correct fit, bypass, flow, and micron-rating requirements.
  • Clean the filler area, filter head, dipstick, and container tops before opening the hydraulic system.
  • Keep replacement oil sealed and stored in a clean, dry location.
  • Replace damaged reservoir breathers and filler-cap seals to keep dirt and moisture out.
  • Record operating hours, oil type, filter part number, service date, and oil-analysis results.
  • After a major hydraulic failure or component repair, follow the OEM flushing and filter-replacement procedure before returning the machine to service.